SwingPix Photo Organizer
User Manual
By:
Justin Berstler
Aju Mathew
Yinka
Ogungbemi
Yinka
Olabinjo
John
Rountree
Mathew Schaffer
Submitted for Drexel University’s Software Engineering Workshop II
This document is also available at
http://swingpix.sourceforge.net/docs/usermanual/
Specifications
SwingPix is
a comprehensive and intuitive system that will allow a user to tag, organize
and modify images and photographs. With
minimal training, a user of SwingPix will be able to import photographs or
other images into “albums” which will serve as a container for these
images. The images can then be altered
to enhance picture quality, resized for viewing and rotated according to users’
preference. These images can be printed
using the printing feature that SwingPix provides and also be burned to a cd
for archiving purposes.
Requirements
A PC with at least 1GHz CPU and at least 256MB of RAM is required to run SwingPix. The machine should be running Java 1.4.1. SwingPix is, so far, platform independent, so you may get by with more efficient hardware.
Installation of the Program
There's really no
installation involved. All you need to
do to run SwingPix is to enter the directory created by unzipping the package
(which presumably you've done in order to be reading this) and run at the
command prompt:
FOR LINUX:
java -cp jdbm-0.12.jar:swingpix.jar:.
swingpix.run.SwingPix
FOR WINDOWS:
java -cp jdbm-0.12.jar;swingpix.jar;.
swingpix.run.SwingPix
You can expect that SwingPix will do just about whatever it wants within this directory (creating/deleting files and folders) but should really not mess with anything outside of it. Also, if you want to go digging into the files and folders created by SwingPix, be our guest - just don't expect everything to work properly next time you fire up SwingPix.
Usage
I.
Creating an album:
To create an album, perform the following:
1. Click on the “Create New Album” button on the Upper left corner of the user interface.

2. Enter the name you wish to give your album in the space provided by the new window and hit “Ok” or hit “Cancel” if you decide not to create an album.

II.
Importing an image
To import an image, perform the following:
1. Click on the “file” menu on the menu bar and choose “Import”

OR
Click on the
“Import Photos” icon on the tools menu at the bottom of the user interface. 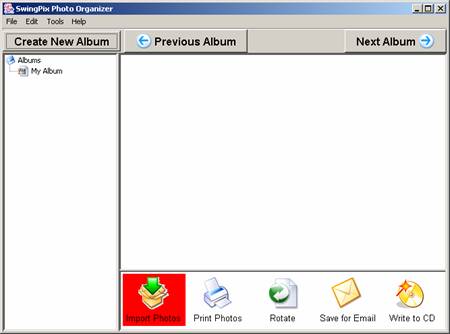
2. At this point the Import Wizard will pop up and guide you through the process of importing an image.
III.
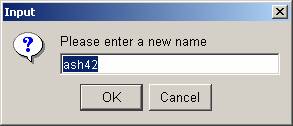
Renaming an image
1. Right click on the thumbnail and it would pop-up a rename button. Click on the rename button and it will open up an input dialog.
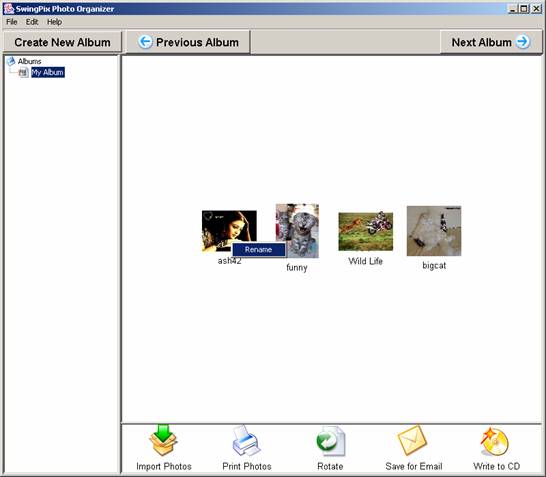
2. Now enter the new name for the image into the input box provided.
IV.
Saving for email
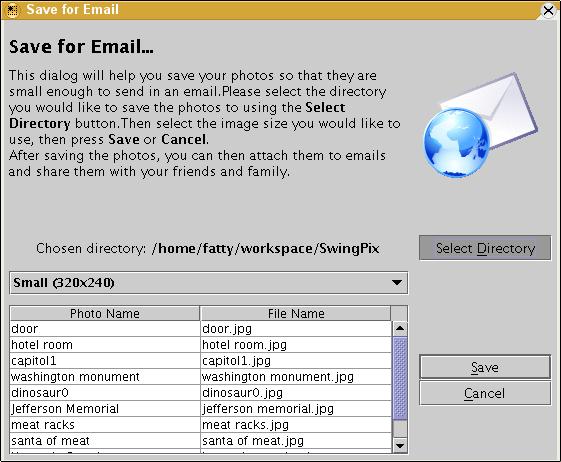
The
“Save for Email” dialog allows you to quickly export a group of photos into a
image file small enough to send over email quickly.
1. Select Photos
Select
an album from the album tree and then select the individual photos you would
like to save by clicking each one once.
Then click on the “Save for Email” icon located in the Icon Panel.

2. Choose a destination
directory
When
the Save for Email dialog appears, the first action you need to take is to
select the destination directory. You can do this by clicking the “Select Directory”
button.
You
will then be presented with a directory selection dialog. From this dialog, select the directory you
would like to export your photos to, then click the Open button.

3. Choose a Size
The
next task is to select the maximum dimensions of the images you would like to
export. Keep in mind that although
larger images are easier to see, they can take a long time to send over email,
particularly with dial-up internet connections.
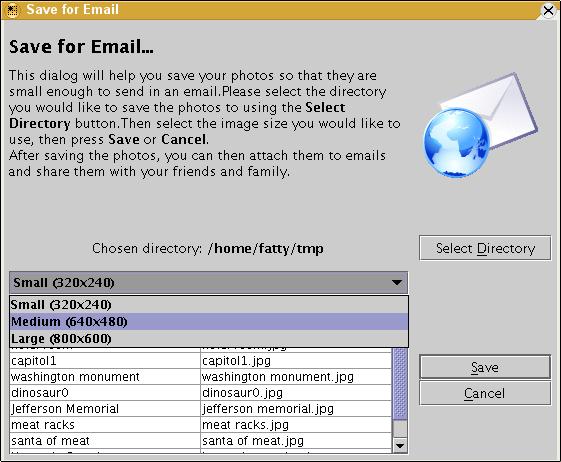
4. Save
You’re
all set to save your photos. After
clicking the Save button, your photos will be resized and saved to the
destination directory you chose earlier.
5. Email!
The
only step left is to email your photos.
You can do this by attaching the photos from the destination directory
to any email and sending them to your friends and family. It’s that easy, and SwingPix makes sure that
not only do your photos look good, but that you won’t spend any more time than
necessary transmitting them.
6. Additional Notes
You
may notice that occasionally, SwingPix will give the exported file a name which
is slightly different than the title you have given it’s original photo. Specifically, all exported file names will be
lower case and could possibly have a “_number”
at the end of the name, where number
is any possible number. This is to
ensure that your exported files have acceptible file names and do not overwrite
any files with the same name is the destination directory.
V.
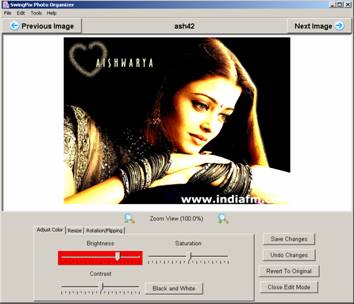
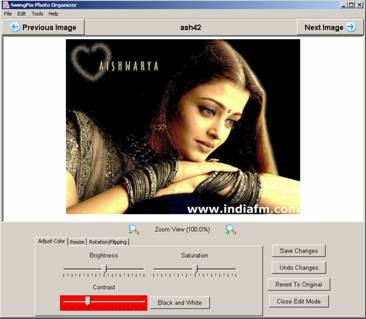
Editing features
Double Click on an image thumbnail to go to the edit mode. The following features are available in the edit mode:
1.
Zoom In
1. Click on the “Zoom In” button to zoom in an image by increments of 10%.

2.
Zoom Out
1. Click on the “Zoom Out” button to zoom out an image by increments of 10 %.

3.
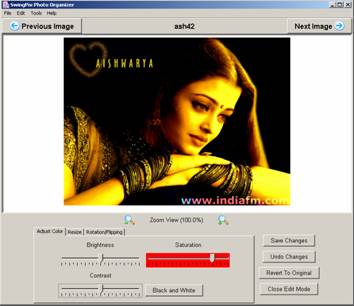
Adjust Color
Click on the “Adjust
Color” tab to go to the color adjustment mode. The following features are
available in the Adjust Color mode: 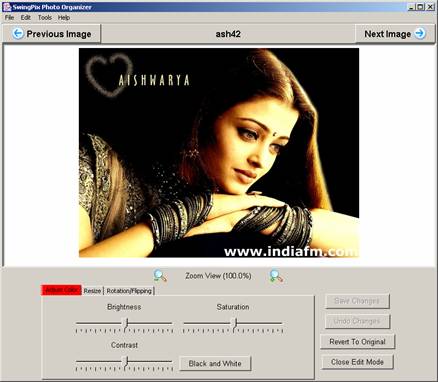
i.
Brightness Adjustment
1. Move the “Brightness” Slider to the right to increase brightness or to the left to decrease it.
ii.
Contrast Adjustment
1. Move the “Contrast” Slider to the right to increase contrast or to the left to decrease it.
iii.
Saturation Adjustment
1.
Move the “Saturation” Slider to the right to
increase saturation or to the left to decrease it.
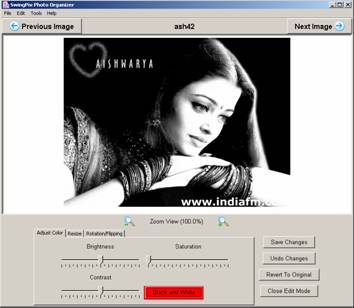
iv.
Black and White
1.
Click on the “Black and White” button to Change to
image from color to black & white.
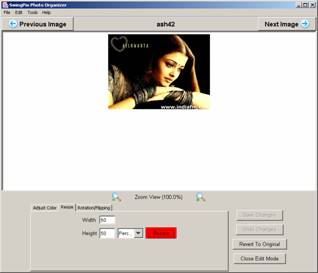
4.
Resize
1. Click on the “Resize” tab to go to the resize mode.

2. Enter the desired value for width and height in the provided text fields and select the type of resizing you would like from the drop down box (Percent/ Pixel).
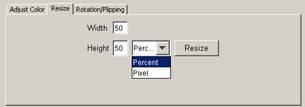
3. Now hit the “Resize” button.
5.
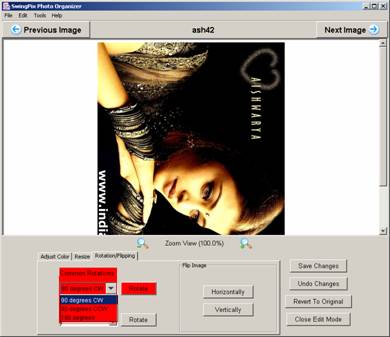
Rotation/Flipping
Click on the “Rotation/Flipping” tab to go to the rotation and flipping mode. The following features are available:
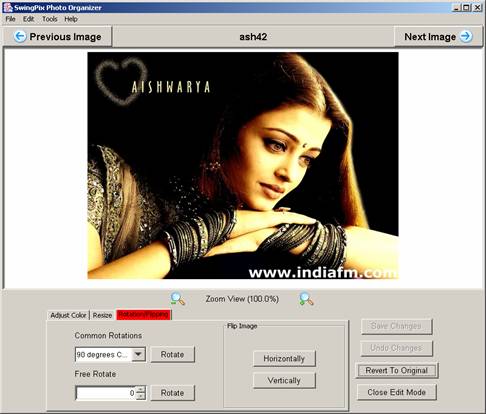
i.
Common Rotation
1. Choose your desired rotation angel from the “Common Rotations” drop down box and click the “Rotate” button.
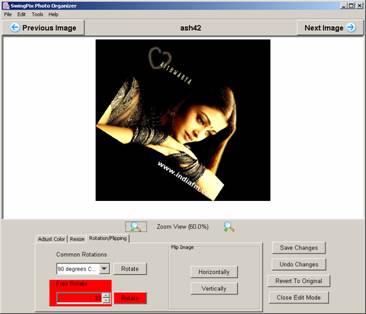
ii.
Free Rotation
1. Select the angle you want your image to be rotated at by hitting the up and down scroll buttons on the “Free Rotate” box, and hit the “Rotate” button.
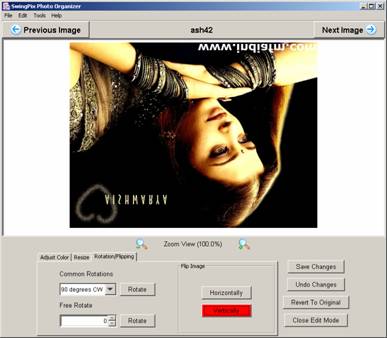
iii.
Flip Horizontal
1. Click on the “ Horizontally” button to flip the image horizontally.

iv.
Flip Vertical
1. Click on the “Vertically” button to flip the image vertically.
6.
Undo Changes
1. Click on the “Undo Changes” button to undo all the changes made to the image.
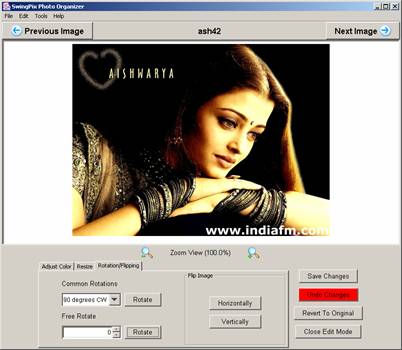
7.
Save Changes
1. Click on the “Save Changes” button to save all the changes made to the image.

8.
Revert To Original
1. Click on “Revert To Original” button to revert the image to the state it was at when first imported.

9.
Close Edit Mode
1. Click on “Close Edit Mode” to go back to the album view.

VI.
Printing
To import an image, perform the following:
1. Click on the “Print Photos” icon on the bottom of the user interface.

2. At this point the Print Wizard will pop up and guide you through the process of importing an image.
VII.
CD Burning
To import an image, perform the following:
1. Click on the “Write to CD” icon on the bottom of the user interface.
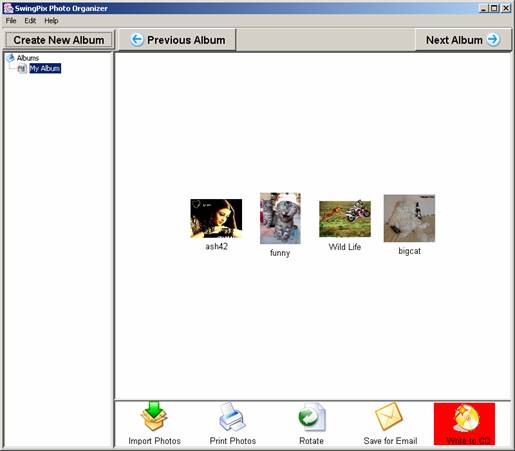
2. At this point the CD Burning Wizard will pop up and guide you through the process of importing an image.